Install And Configure Zabbix 7.0 LTS
I first used Zabbix in 2020 when I was learning about monitoring tools in vocational high school. Fast forward to 2022, after graduating from vocational high school, I joined a Sys-Admin bootcamp in West Jakarta. During this bootcamp, I learned about Zabbix again and implemented it in a real production environment (for my freelance project, thanks to my friend in the IPv1 Community)
Zabbix is an all-around monitoring tool. You can use Zabbix to monitor hosts (Linux, Windows, *BSD, or network hardware) by installing a Zabbix agent on each host or by using the SNMP protocol. Additionally, there are many templates available for general applications (Web Servers, Databases, Virtualization, Cloud, etc.). For more information, please refer to the Zabbix Website's
Zabbix Website Integration and Templates
In this tutorial i use Ubuntu Server 22.04 LTS to host my Zabbix server, what we need:
- Webserver (Apache/Nginx)
- Database Server(MySQL/MariaDB/PostgreSQL)
Update system
Make sure your system package is up to-date
sudo apt-get update && apt-get upgrade -yInstall Zabbix
Swith to root user
sudo -i Add Zabbix repository
wget https://repo.zabbix.com/zabbix/7.0/ubuntu/pool/main/z/zabbix-release/zabbix-release_latest_7.0+ubuntu22.04_all.deb
dpkg -i zabbix-release_latest_7.0+ubuntu22.04_all.deb
apt update
Install Zabbix Packages (Server, Frontend, Zabbix-Agent2)
apt install zabbix-server-mysql zabbix-frontend-php zabbix-nginx-conf zabbix-sql-scripts zabbix-agent2 -yInstall MariaDB
apt install mariadb-{server,client} -yCreate database for Zabbix
mysql -u root -p
insertpassword

MariaDB [(none)]> create database zabbix character set utf8mb4 collate utf8mb4_bin;
Query OK, 1 row affected (0.002 sec)

MariaDB [(none)]> create user zabbix@localhost identified by 'secretpassword';
Query OK, 0 rows affected (0.007 sec)

MariaDB [(none)]> grant all privileges on zabbix.* to zabbix@localhost;
Query OK, 0 rows affected (0.003 sec)

MariaDB [(none)]> set global log_bin_trust_function_creators = 1;
Query OK, 0 rows affected (0.000 sec)

MariaDB [(none)]> quit;
Import initial schema and data for Zabbix database
zcat /usr/share/zabbix-sql-scripts/mysql/server.sql.gz | mysql --default-character-set=utf8mb4 -uzabbix -p zabbix

Enter password: insertpassword
Disable log_bin_trust_function_creators option after import database schema
 mysql -u root -p
 insertpassword

MariaDB [(none)]> set global log_bin_trust_function_creators = 0;
Query OK, 0 rows affected (0.000 sec)

MariaDB [(none)]> quit;
Configure database in Zabbix Server configuration
Use your favourite text editor
vi /etc/zabbix/zabbix_server.conf
In line 131, add your zabbix database user password
DBPassword=secretpasswordConfigure Nginx Configuration
Define listen port and server_name to access Zabbix Web-UI
vi /etc/nginx/conf.d/zabbix.conf
server {
        listen          80;
        server_name     zbx.pramudika.my.id;

        #other configuration
}
Start Zabbix Server, Zabbix-Agent2 and Webserver with PHP
systemctl restart zabbix-server zabbix-agent2 nginx php8.1-fpm
systemctl enable zabbix-server zabbix-agent2 nginx php8.1-fpm
Initial Zabbix Setup
Access Zabbix-Web UI
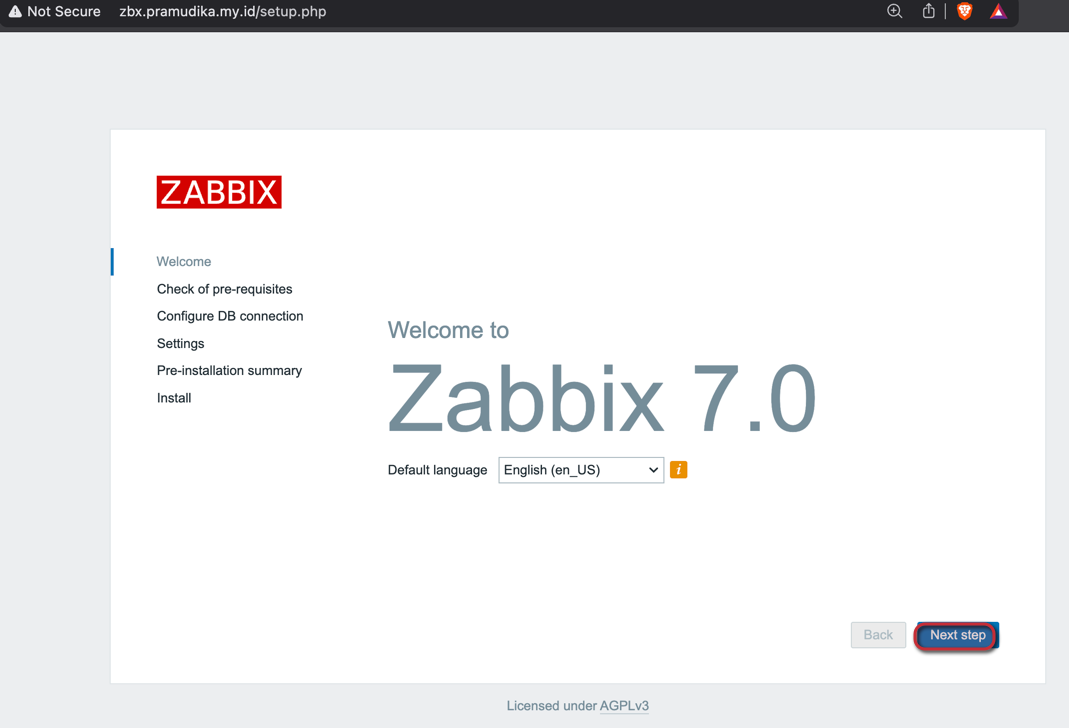
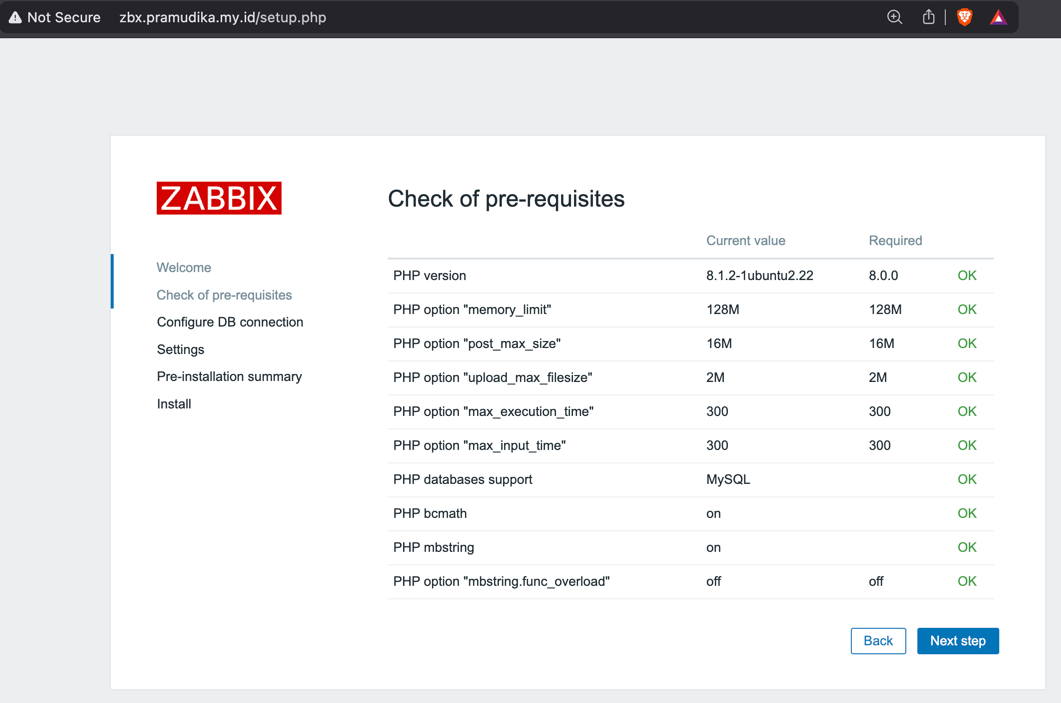
Check pre-requisites, is proper by default
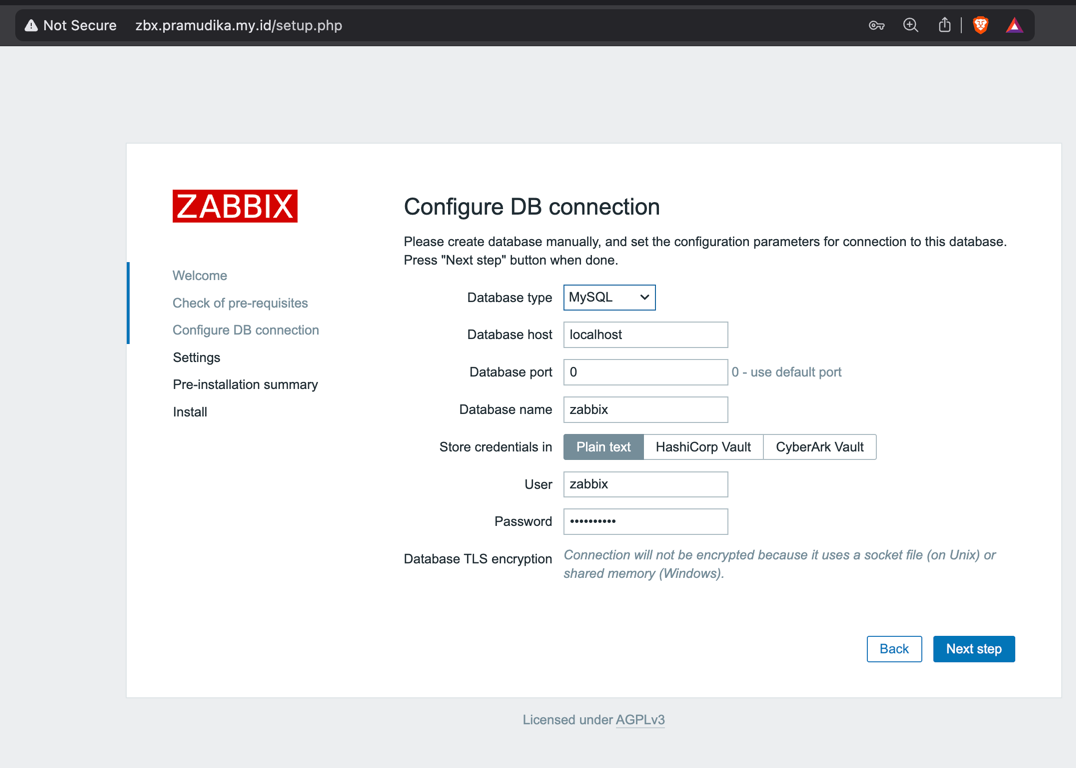
Configure database connection, insert zabbix user database password
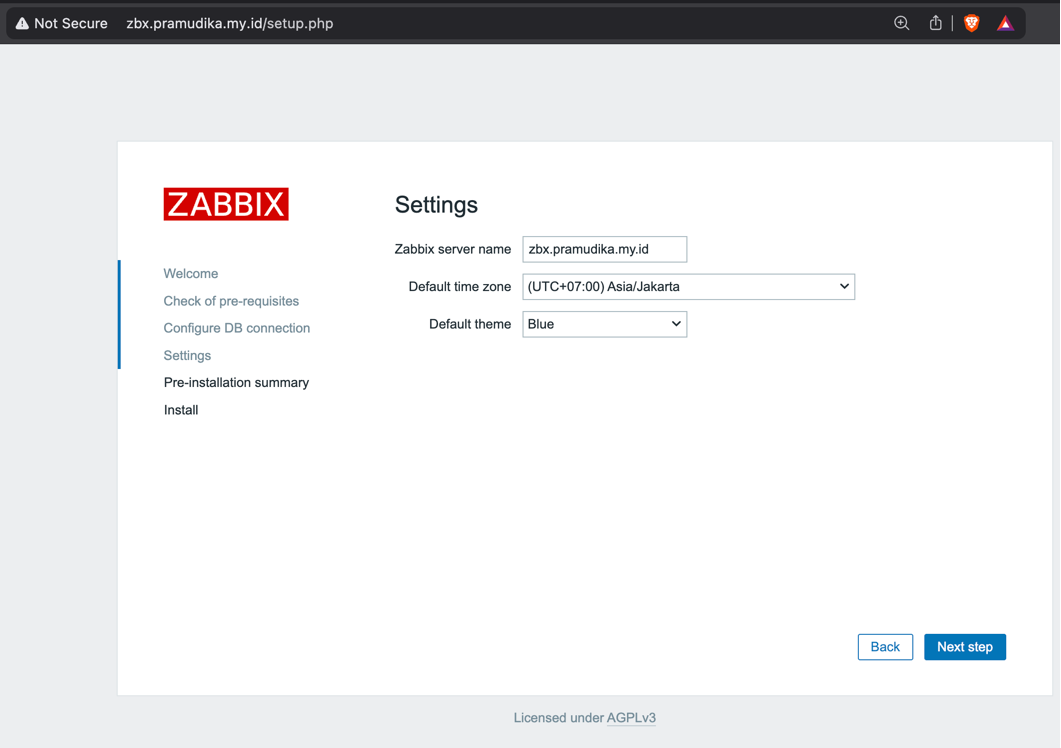
Settings for Zabbix Server name, and Time zone
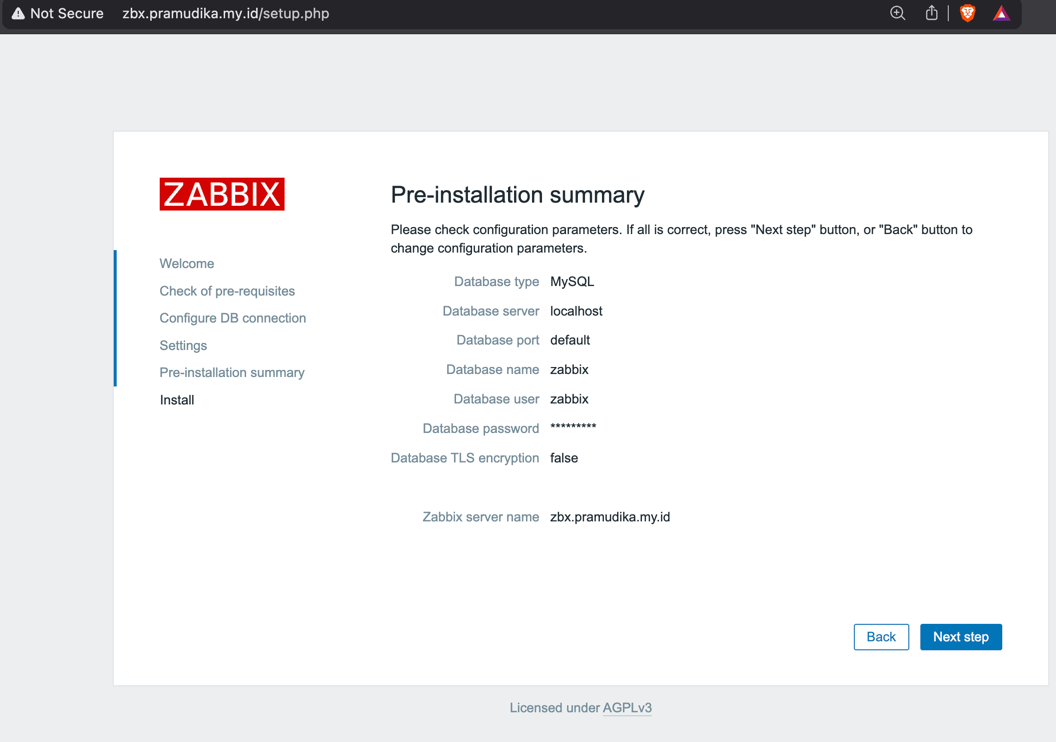
Summary Pre-installation and installation successfully

Access Zabbix
Access Zabbix with default user
username: Admin
password: zabbix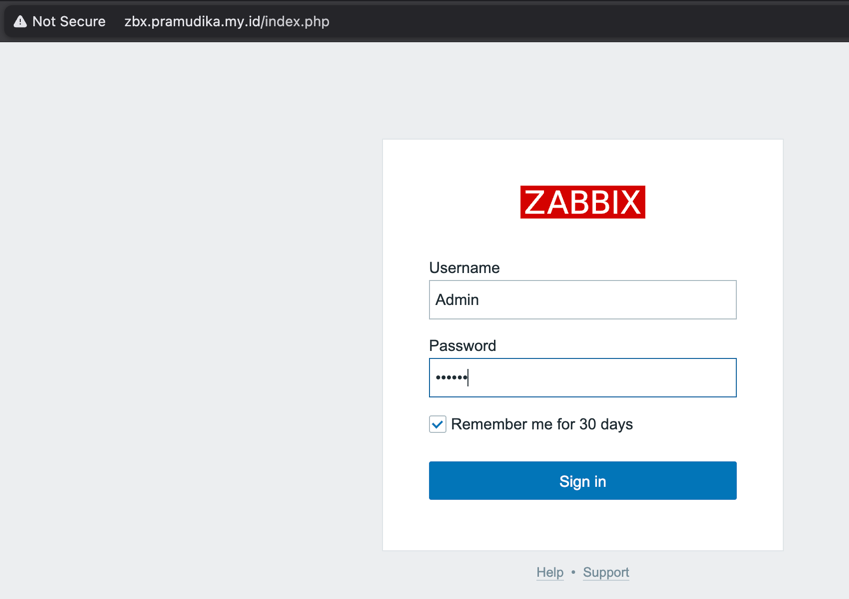

Reference

Conclusion
We successfully installed and set up Zabbix. In the next article, I will share how to monitor hosts in Zabbix. Stay tuned!